 Small stitches. Brighter days.

Introduction#
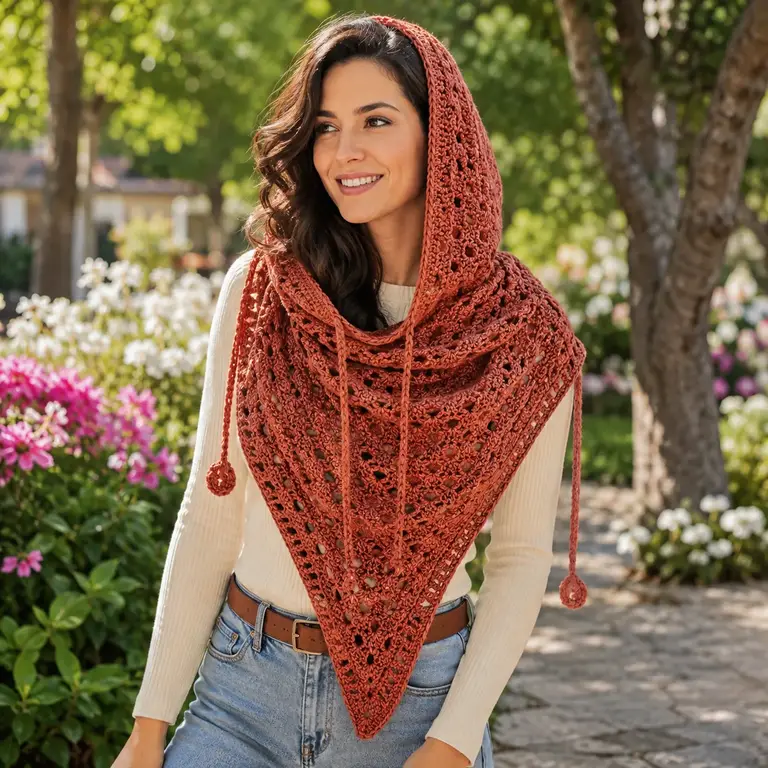
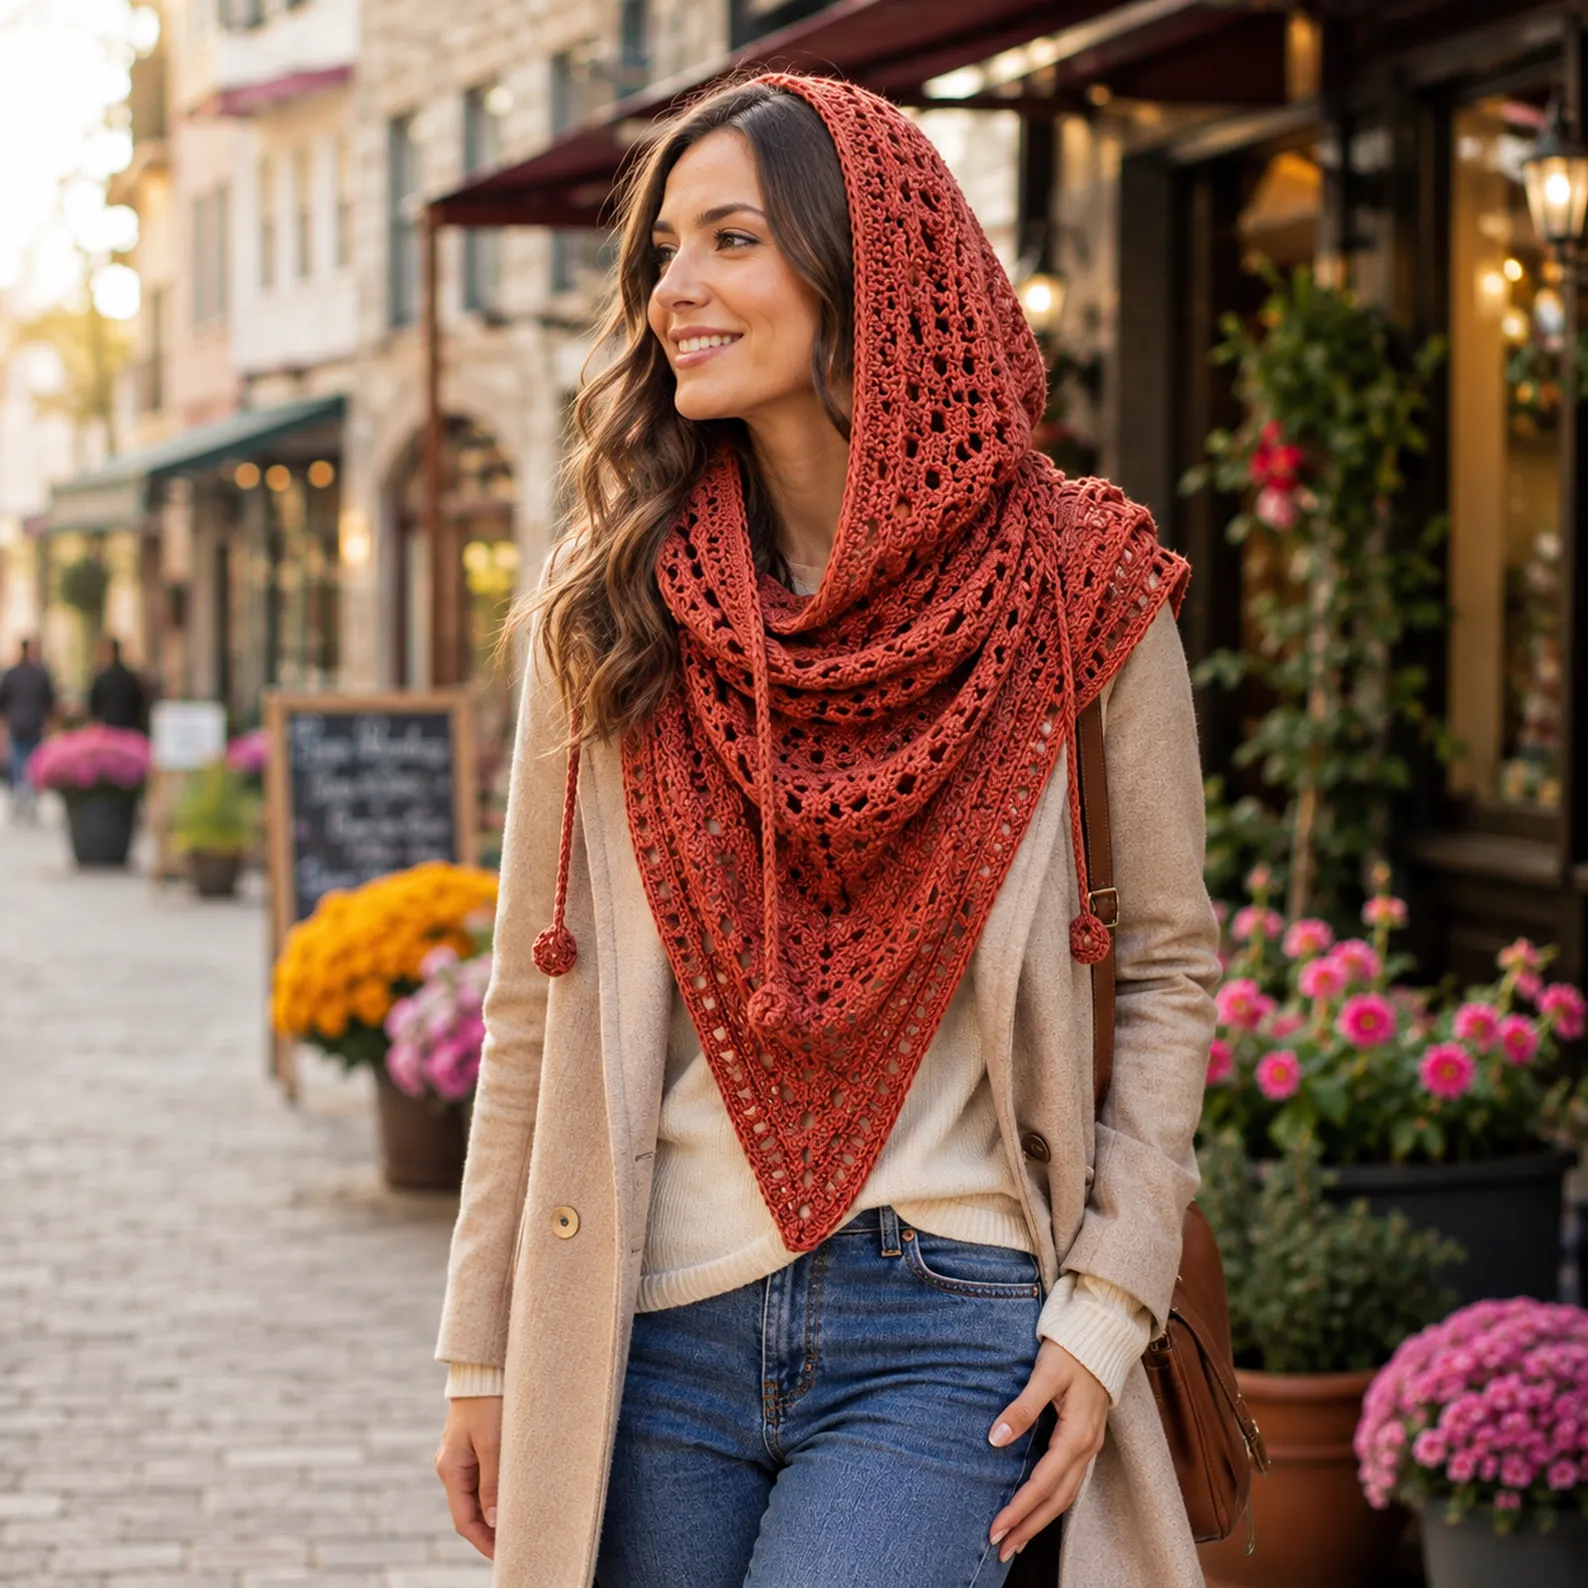
A cozy hooded cowl is one of those crochet projects that combines warmth, comfort, and everyday style in one beautiful accessory. This crochet pattern creates a soft triangular cowl that wraps around the shoulders while extending upward into a comfortable hood. The openwork texture gives the finished piece a delicate, lightweight appearance, while the layered construction provides extra coverage around the neck.
This easy crochet pattern is a wonderful choice if you want something more interesting than a traditional scarf but less complicated than a full crochet garment. It can be worn over a sweater, long-sleeve shirt, coat, or jacket, making it a versatile accessory for cool autumn mornings, winter walks, and chilly spring evenings.
The design features a deep triangular front, a hooded section that comfortably frames the head, and long crochet ties finished with small decorative motifs. The combination of an earthy rust-colored yarn and an airy stitch pattern gives the accessory a stylish handmade appearance, but you can easily change the color to suit your wardrobe.
If you are looking for a free crochet pattern that teaches useful techniques while producing something practical, this hooded cowl is an excellent project. The main fabric can be built from repeated stitch rows, so once you understand the stitch sequence, the pattern becomes rhythmic and relaxing to crochet.
Explore more scarves crochet patterns in our pattern library.
Detailed Description of the Crochet Pattern#
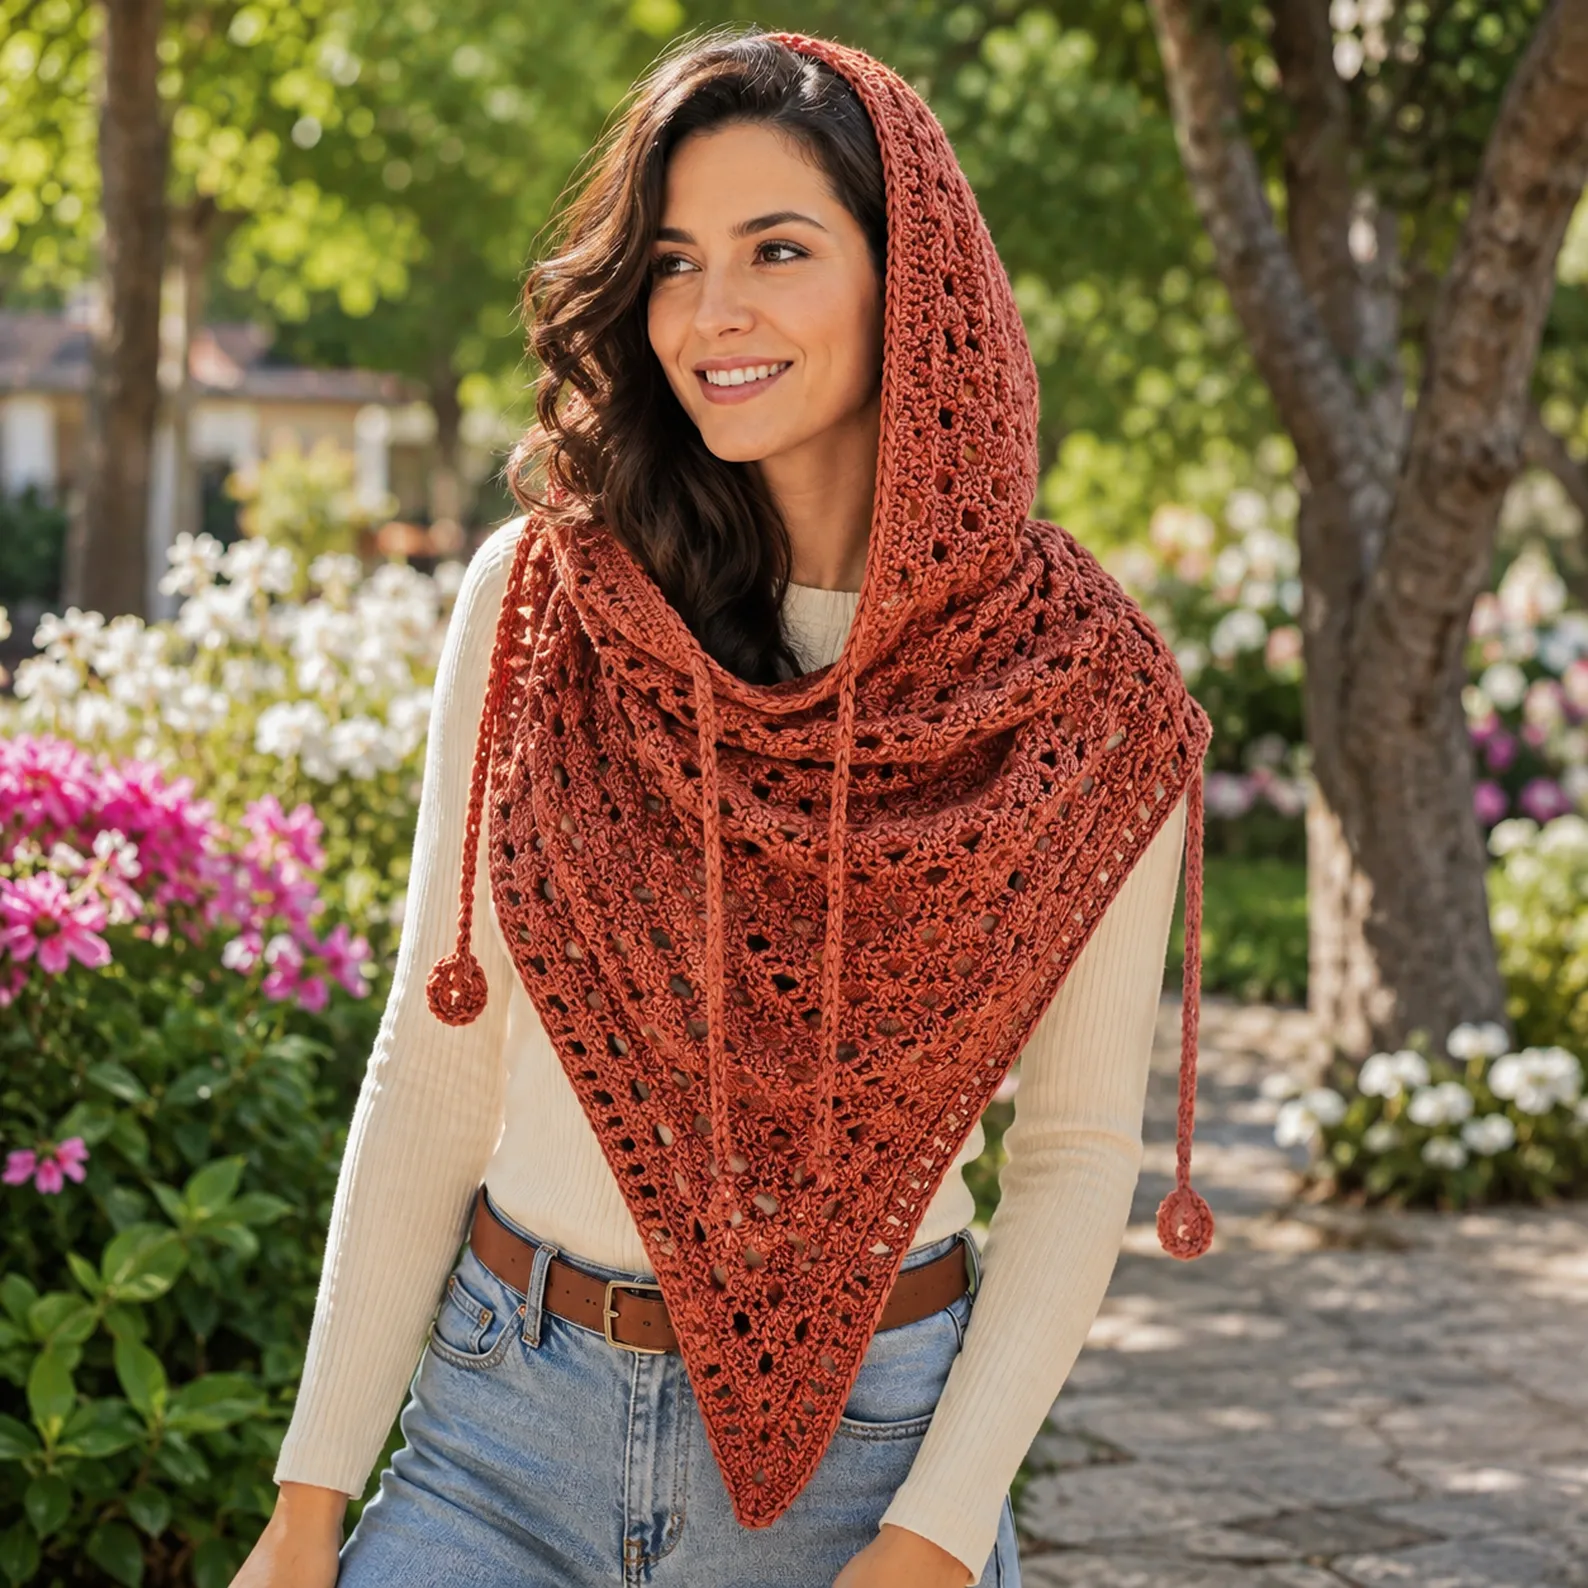
This hooded cowl is designed as a triangular shawl-style accessory with an integrated hood. Instead of making a conventional scarf that hangs around the neck, the fabric is shaped so that the center front extends downward into a point while the upper section wraps around the neck and rises behind the head.
The overall design includes four main elements:
- A wide triangular cowl section
- A hood formed from a rectangular or gently shaped section of crochet fabric
- Long ties that allow the neckline to be adjusted
- Decorative crochet circles or small motifs attached to the ends of the ties
The open texture is particularly attractive because it allows the finished accessory to remain lightweight. The spaces between stitches create visual interest without making the project excessively bulky.
For a similar result, choose a yarn with good drape. A soft acrylic, cotton-acrylic blend, bamboo blend, or lightweight wool can all work beautifully. A warm rust, terracotta, cinnamon, cream, olive, mustard, or deep burgundy shade would complement the autumn-inspired look.
The exact dimensions can be adjusted according to your preferred fit. A smaller cowl can be made for a snug neck accessory, while additional rows can create more shoulder coverage and a deeper front point.
Skill Level Explanation: Who Is This For?#
This project is suitable for advanced beginners and intermediate crocheters, but it can also be attempted by confident beginners who already know the basic crochet stitches.
You should be comfortable with:
- Making a foundation chain
- Single crochet
- Double crochet
- Chain stitches
- Slip stitches
- Working into chain spaces
- Increasing at the edges
- Counting stitches and pattern repeats
- Basic seaming
- Weaving in yarn ends
The openwork texture may look complicated at first, but many lace-style crochet patterns are based on simple combinations of double crochet and chain stitches. Once you identify the repeating sequence, the rows become much easier to memorize.
If you are completely new to crochet, practice a small swatch before beginning the full project. This will help you understand how chain spaces work and give you an opportunity to check your tension.
Materials Needed#
Yarn
Choose approximately 500–700 yards of lightweight to medium-weight yarn for an adult-sized hooded cowl. The exact amount will depend on the yarn weight, hook size, finished dimensions, and how dense you make the fabric.
Good options include:
- DK-weight acrylic yarn
- Lightweight wool
- Cotton-acrylic blend
- Bamboo blend
- Soft worsted yarn worked with a slightly larger hook for a more open texture
A yarn with good drape is particularly important for this crochet tutorial. Stiff yarn can cause the hood and cowl to stand away from the body instead of falling naturally over the shoulders.
Crochet Hook
A 4.5–5.5 mm crochet hook is a useful starting range for DK or light worsted yarn. Choose your hook based on the yarn label and the fabric you want to create.
For an airy lace effect, a slightly larger hook can create more open spaces. If your stitches become too loose or the fabric loses its shape, move down one hook size.
Other Supplies
You will also need:
- Tapestry needle
- Scissors
- Stitch markers
- Measuring tape
- Blocking pins
- Blocking mat or clean towel
Blocking is highly recommended for this project because it helps open the lace stitches and gives the triangular edges a cleaner, more polished appearance.
Stitches & Techniques Explained#
Chain Stitch
The chain stitch is used to create spaces within the lace pattern. Chain spaces are particularly important because they give the cowl its open texture.
Single Crochet
Single crochet creates a firm edge and can be useful for stabilizing the outside border.
Double Crochet
Double crochet is one of the main stitches used in the decorative fabric. Its height creates a lighter, more open texture than single crochet.
Chain-Space Stitching
Instead of always working into the top of a traditional stitch, you will often work into the space created by a previous chain. This technique makes lace patterns faster to crochet once you become comfortable locating the spaces.
Increasing
The triangular shape is created by strategically increasing at the edges and, depending on the construction, along the center. Increasing allows the fabric to expand as the rows become longer.
Working in Rows
Unlike amigurumi, this accessory is primarily worked back and forth in rows. At the end of each row, turn your work and begin the next row.
Blocking
Blocking involves gently shaping the finished crochet fabric while it is damp or exposed to steam, depending on the fiber. It can dramatically improve the appearance of lace crochet by opening the stitch pattern and straightening the edges.
Step-by-Step Instructions#
Part 1: Make a Crochet Gauge Swatch
Before starting the hooded cowl, make a small swatch using the yarn and hook you intend to use.
Work several rows of the basic lace repeat and measure the fabric. Your goal is not necessarily to match a specific commercial gauge but to make sure the fabric has the drape and openness you want.
If the swatch feels stiff, try a larger hook. If the stitches are extremely loose and difficult to control, use a smaller hook.
Part 2: Begin the Triangular Cowl
Start with a foundation chain of approximately 20 stitches for a small sample or 30–35 stitches for a wider adult project. The foundation should establish the upper portion of the triangular fabric.
Work the first row using a combination of double crochet and chain spaces. A simple beginner-friendly repeat is:
Row 1: Ch 3 to count as the first double crochet, work 1 dc in the next stitch, ch 1, skip 1 stitch, then repeat the dc and chain-space sequence across the row.
As the project develops, the chain spaces create the openwork effect.
Part 3: Establish the Triangle
Turn your work and begin the next row.
Work the established lace repeat across the row while adding an increase near each outside edge. This can be done by working additional stitches into the first and last stitch or by adding an extra stitch group at the edge.
A simplified shaping concept is:
Row 2: Ch 3, increase at the beginning, continue the lace repeat across, and increase at the end.
Repeat the shaping process on subsequent rows.
The fabric should gradually become wider as you move downward. Keep checking that both sides expand evenly.
Part 4: Continue the Lace Repeat
Once you understand the basic stitch sequence, repeat the same pattern across the following rows.
A useful decorative repeat can be based on:
- Double crochet
- Chain 1
- Skip 1
- Double crochet
- Chain 2
- Skip 2
- Double crochet
The exact spacing can be adjusted according to your yarn and desired openness. The important part is to keep the repeat consistent from row to row.
Do not worry if the fabric looks slightly uneven while you are crocheting. Lace crochet often looks much more polished after blocking.
Part 5: Shape the Pointed Front
Continue adding stitches along the outer edges until the cowl reaches your desired width.
For a deeper triangular front, continue crocheting additional rows. The longer you work the center section, the farther the point will extend down the front of the body.
For a shorter cowl, stop earlier.
A useful adult target is approximately 22–28 inches from the upper edge to the deepest point, but this is highly customizable.
Part 6: Create the Hood
The hood can be constructed from the upper portion of the cowl by creating a wide rectangular panel and folding it into shape.
Measure the section that will sit behind the head. For an average adult, a hood panel around 11–13 inches tall can provide comfortable coverage, while the width should be large enough to wrap around the back and sides of the head.
Continue the lace stitch pattern across rows without the dramatic triangular increases used for the front section.
Keep the edges straight during this stage.
Part 7: Form the Hood Seam
Once the hood section reaches the desired height, fold the fabric so that the top edges meet.
Use a tapestry needle and matching yarn to seam the upper edge.
You can use a mattress-style seam for a subtle finish or a whip stitch if you prefer a simpler construction.
Do not pull the seam too tightly. The hood should remain flexible and comfortable around the head.
Part 8: Add the Neck and Face-Framing Edge
Work a finishing round or row around the opening of the hood and neckline.
A simple single crochet border can help stabilize the lace fabric.
For a more decorative finish, you can work a small scalloped edging using combinations of single crochet, chain stitches, and double crochet.
The border is also a good place to correct minor differences in tension.
Part 9: Crochet the Ties
The long ties add both function and decoration.
Attach yarn near the front neckline and create a long chain, approximately 18–24 inches depending on how much length you want.
Work a row of single crochet back across the chain for a stronger cord-like tie.
Repeat on the opposite side.
The ties can be worn hanging loosely, wrapped around the neck, or tied beneath the chin.
Part 10: Add Decorative Ends
The design can be finished with small crocheted circles or medallions at the ends of the ties.
To make a simple decorative circle:
Round 1: Work 6 sc into a magic ring.
Round 2: Increase in each stitch around.
Round 3: Work a simple single crochet round and finish.
Flatten the circle gently and sew the center closed if necessary.
Attach one decorative piece to each tie.
You can also substitute tassels, small flowers, leaves, beads, or pom-poms.
Part 11: Finish the Edges
Once all major sections are complete, inspect the outside edge of the cowl.
A simple single crochet border can give the project a cleaner outline and prevent the lace fabric from stretching excessively.
Work evenly around the edges without adding too many stitches. Too many stitches can cause the border to ripple, while too few can make it pull inward.
Part 12: Weave in the Ends
Use a tapestry needle to weave every loose yarn tail securely into the wrong side of the fabric.
For long-lasting wear, weave each end in multiple directions before trimming the excess.
Do not simply cut the yarn immediately after fastening off because repeated use can cause the end to unravel.
Part 13: Block the Finished Cowl
Blocking is one of the most valuable finishing steps for this project.
Gently wet the completed piece according to the yarn manufacturer's care instructions. Remove excess water without wringing the fabric.
Lay the cowl flat and shape the triangular point, hood opening, and outer edges with your fingers. Use blocking pins to hold the shape while it dries.
Once completely dry, remove the pins.
The lace pattern should look more open, even, and defined.
Common Mistakes and How to Avoid Them#
Losing the Stitch Repeat
Lace crochet can become confusing when chain spaces are mistaken for regular stitches.
Solution: Use stitch markers at the beginning of every row and highlight the repeating section in your written notes.
Uneven Triangle Edges
If one edge increases more quickly than the other, the triangle may become asymmetrical.
Solution: Count the stitches after every row and compare both sides visually.
Making the Fabric Too Tight
Tight tension can prevent the lace from opening properly.
Solution: Relax your hands and try a slightly larger hook.
Making the Fabric Too Loose
Very loose stitches may produce an unstable fabric that stretches excessively.
Solution: Move down one hook size or reduce the amount of chain spacing.
Forgetting the Turning Chain
The turning chain helps maintain the correct height for the next row.
Solution: Check your pattern before beginning each new row and use a consistent turning-chain method.
Hood Too Small
A hood that looks attractive flat may feel tight when worn.
Solution: Measure around your head and allow additional room for hair and comfortable movement.
Skipping Blocking
Without blocking, the lace may look compressed and uneven.
Solution: Block the finished project before judging the final appearance.
Expert Tips for Better Results#
Choose Yarn for Drape
The yarn's behavior can be more important than the color. A yarn that drapes naturally will produce a much more comfortable hooded cowl.
Swatch Before Starting
A small swatch can save hours of work. It allows you to test your stitch pattern, hook size, and fabric density before committing to the full project.
Mark Pattern Repeats
Place stitch markers between major pattern repeats. This makes it easier to identify mistakes without having to unravel an entire row.
Measure as You Crochet
Do not rely only on row counts. Measure the cowl around your shoulders and check the hood against your head as the project grows.
Keep the Hood Flexible
Avoid dense stitches throughout the hood. The wearer should be able to pull it comfortably over the head without stretching the fabric excessively.
Block Carefully
Do not stretch the crochet beyond its natural shape. The purpose of blocking is to even the stitches and improve the drape, not to force the project dramatically larger.
Make the Ties Strong
Because the ties are handled frequently, crochet them firmly and weave the attachment points securely.
Variations and Customization Ideas#
Try Different Colors
A warm terracotta shade creates an autumn-inspired accessory, while cream, beige, charcoal, sage, dusty rose, or burgundy can give the same design a completely different personality.
Make a Two-Tone Cowl
Use one color for the hood and another for the triangular body. This makes the structure of the design more noticeable.
Add Stripes
Change colors every few rows for a modern striped effect. Alternating two neutral colors can create a subtle look, while bright colors make the cowl more playful.
Add Fringe
Short fringe along the lower triangular edge can give the accessory a bohemian appearance.
Use Tassels
Replace the small circular tie ends with tassels for an especially cozy finish.
Add Crochet Flowers
Small flowers can be sewn near one side of the hood or attached to the tie ends.
Make It Oversized
For a dramatic winter accessory, increase the number of rows and use a thicker yarn. A larger hood can also provide extra warmth.
Create a Lightweight Version
For spring or early autumn, use cotton or bamboo-blend yarn and a larger hook to create a breathable lace cowl.
Benefits of This Crochet Project#
It Is Practical
Unlike purely decorative crochet projects, a hooded cowl can become a useful part of your everyday wardrobe.
It Combines Several Skills
This project introduces shaping, lace stitches, seaming, edging, blocking, and decorative finishing.
It Is Easier Than a Full Sweater
If you want to crochet something wearable but are not ready for a complicated garment, this is an excellent intermediate step.
It Makes a Thoughtful Handmade Gift
A hooded cowl can be customized to match someone's favorite color and personal style.
It Is Easy to Personalize
You can adjust the length, width, hood size, yarn, colors, edging, and decorative details.
It Is Relaxing to Crochet
Once the lace repeat becomes familiar, the project can develop a satisfying rhythm that makes it enjoyable for quiet evenings or weekend crafting.
Internal Linking Suggestions#
If you are publishing this tutorial on a crochet blog, connect it with related educational content to help readers discover more projects.
Suggested internal links include:
- You may also like: Easy Crochet Hood Pattern for Beginners
- You may also like: How to Crochet a Triangle Shawl
- You may also like: Easy Crochet Scarf Pattern
- You may also like: Beginner's Guide to Crochet Lace Stitches
- You may also like: How to Block Crochet Projects
- You may also like: Best Yarn for Crochet Accessories
- You may also like: Easy Crochet Winter Accessories
- You may also like: Free Crochet Shawl Patterns for Beginners
These related articles can create a useful learning path, especially for readers who discover this project while searching for their first wearable crochet project.
FAQ Section#
Is a crochet hooded cowl easy to make?
Yes. A hooded cowl can be easier than a full crochet hooded sweater because it requires fewer fitted pieces. Once you understand the repeating lace pattern and basic shaping, the project becomes quite straightforward.
What yarn is best for a crochet hooded cowl?
A soft yarn with good drape is ideal. DK-weight acrylic, lightweight wool, cotton blends, and bamboo blends are all good options. Choose a yarn that feels comfortable against the neck and face.
How much yarn do I need for a crochet hooded cowl?
For an adult-sized design, approximately 500–700 yards is a useful starting estimate. The actual amount depends on yarn weight, hook size, finished measurements, and how many rows you crochet.
What crochet hook size should I use for a hooded cowl?
For DK or light worsted yarn, a 4.5–5.5 mm hook is a reasonable starting point. A larger hook creates a more open lace fabric, while a smaller hook creates a denser and warmer fabric.
Can a beginner make a crochet hooded cowl?
Yes, especially if the beginner already knows basic stitches such as single crochet, double crochet, and chain stitch. It is helpful to practice the lace repeat on a small swatch before starting the full accessory.
How do I make my crochet cowl warmer?
Use a warmer fiber such as wool or a wool blend, reduce the size of the chain spaces, and choose a slightly smaller hook. You can also add a simple dense border around the neck opening.
How do I make a crochet hood fit better?
Measure the circumference of the wearer's head and compare it with the hood opening. Add or remove rows to adjust the height, and modify the width of the hood panel if additional coverage is needed.
Why should I block a crochet lace cowl?
Blocking helps open the chain spaces, straighten the edges, and improve the overall drape. It is especially helpful when working with lace-inspired crochet stitches.
Can I make this hooded cowl in a different size?
Absolutely. You can change the number of increase rows to alter the triangular section and adjust the hood measurements to create a smaller or larger fit.
Can I turn this crochet pattern into a hooded scarf?
Yes. By extending the triangular body and reducing or omitting the enclosed hood section, you can create a scarf-like variation. You can also add longer ties or fringe for a more traditional scarf appearance.
Conclusion#
This easy crochet hooded cowl pattern is a beautiful way to create a practical handmade accessory while practicing several useful crochet techniques. The triangular shape, open lace texture, comfortable hood, and decorative ties combine to create a piece that feels both cozy and stylish.
The project is especially appealing because you can adjust almost every part of it. Choose a different yarn, change the color, make the hood larger, extend the triangular front, or replace the decorative tie ends with tassels or flowers.
For beginners, the key is to work slowly and focus on consistency rather than speed. Keep track of your stitches, mark your repeats, measure the project as you go, and take advantage of blocking when the crochet is finished.
For experienced crocheters, this DIY crochet project is an excellent blank canvas for experimenting with lace stitch combinations and personalized details. You can even use the basic construction as inspiration for scarves, shawls, cowls, and other wearable accessories.
If you have been searching for a crochet pattern that is practical, stylish, customizable, and enjoyable to make, this hooded cowl is a wonderful project to add to your handmade wardrobe.
Grab your favorite yarn, choose a comfortable hook, and begin with a small swatch. Before long, you will have a beautiful handmade hooded cowl that can keep you comfortable on cool days while showing off your crochet skills.
Happy crocheting!